展开您的视频播放体验
可折叠设备向用户们提供了使用他们的手机做更多事情的可能性,包括*桌面模式**等创新,也就是当手机平放时,铰链处于水平位置,同时折叠屏幕处于部分打开的状态。
当您不想将手机握在手里使用时,桌面模式非常方便。它很适合于看媒体、进行视频通话、拍照甚至是玩游戏。
一个很好的例子是 Google Duo 团队 对其应用进行的优化,从而使该应用在平板电脑和可折叠设备上均能运行良好。
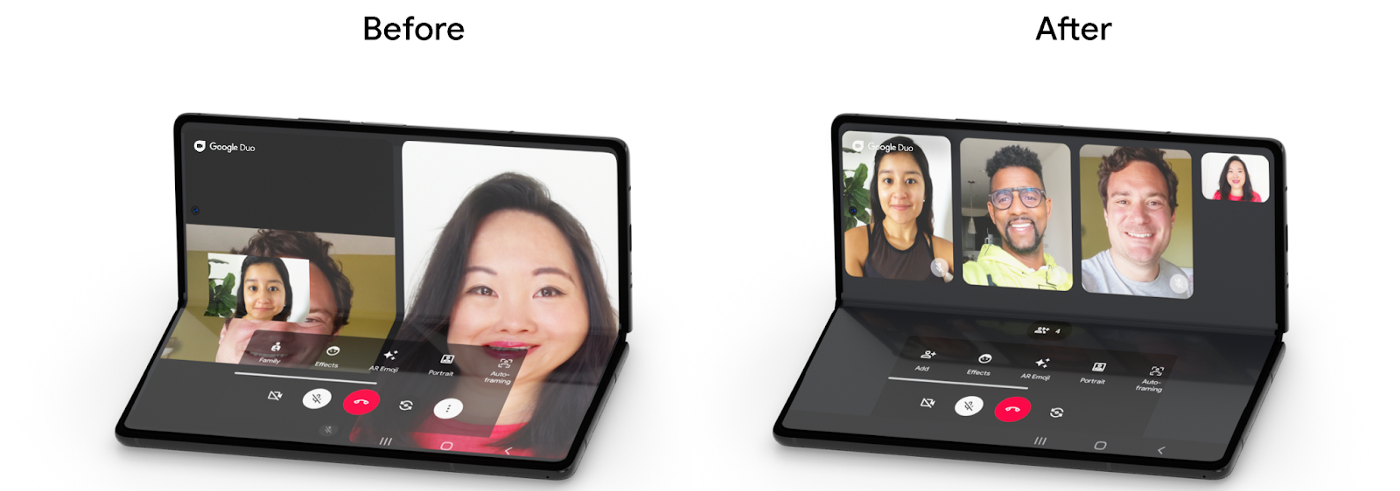
△ Duo 应用在优化前后的对比
在这篇文章中,您会了解到一个简单而又高效的方式来使您的应用在可折叠设备上运行时适配布局。
这是一个简单的媒体播放器案例,它会自动调节尺寸以避免让折叠处出现在画面中间,并且调整播放控制组件的位置,从屏幕完全展开时嵌入画面中,变为当屏幕部分折叠时显示为单独的面板。如同视频展示的样子:
△ 在 Samsung Galaxy Z Fold2 5G 手机上展示桌面模式的案例
*桌面模式在 Samsung Galaxy Z 系列可折叠手机上也被称为 Flex 模式。
前期准备
示例应用使用了 Exoplayer,这是 Android 平台上非常流行的开源媒体播放库。同时还用到了以下 Jetpack 组件:
- MotionLayout,它是 ConstraintLayout 的一个子类。MotionLayout 结合了父类的灵活性,同时又具备在视图从一种姿态过渡到另一种时展示流畅动画的能力。
- ReactiveGuide,这是一个不可见的组件,它会在某个 SharedValue 发生变化时自动改变自己的位置。ReactiveGuide 需要与 Guideline 辅助类共同作用。
- WindowManager,这是一个帮助应用开发者们对新设备类型参数提供支持的库,并且为不同的窗口特征提供了通用的 API 接口。
要使用这些库,您必须将 Google Maven 库添加到项目中,并且声明相关依赖:
dependencies {
    ...
    // 成文时使用如下的版本号,Exoplayer 最新版本号详见 https://github.com/google/ExoPlayer/releases
    implementation 'com.google.android.exoplayer:exoplayer-core:2.14.1'
    implementation 'com.google.android.exoplayer:exoplayer-ui:2.14.1'

    implementation 'androidx.constraintlayout:constraintlayout:2.1.0-rc01'
    implementation 'androidx.window:window:1.0.0-beta01'

    ...
}
布局
首先考虑视频播放器 Activity 的布局,其根元素是包含了三个子视图的 MotionLayout。
<androidx.constraintlayout.motion.widget.MotionLayout
    xmlns:android="http://schemas.android.com/apk/res/android"
    xmlns:app="http://schemas.android.com/apk/res-auto"
    xmlns:tools="http://schemas.android.com/tools"
    android:id="@+id/root"
    android:layout_width="match_parent"
    android:layout_height="match_parent"
    android:background="@color/black"
    app:layoutDescription="@xml/activity_main_scene"
    tools:context=".MainActivity">

    <com.google.android.exoplayer2.ui.PlayerView
        android:id="@+id/player_view"
        android:layout_width="0dp"
        android:layout_height="0dp"
        app:layout_constraintBottom_toTopOf="@+id/fold"
        app:layout_constraintLeft_toLeftOf="parent"
        app:layout_constraintRight_toRightOf="parent"
        app:layout_constraintTop_toTopOf="parent"
        app:use_controller="false" />

    <androidx.constraintlayout.widget.ReactiveGuide
        android:id="@+id/fold"
        app:reactiveGuide_valueId="@id/fold"
        app:reactiveGuide_animateChange="true"
        app:reactiveGuide_applyToAllConstraintSets="true"
        android:orientation="horizontal"
        app:layout_constraintGuide_end="0dp"
        android:layout_height="wrap_content"
        android:layout_width="wrap_content" />

    <com.google.android.exoplayer2.ui.PlayerControlView
        android:id="@+id/control_view"
        android:layout_width="0dp"
        android:layout_height="0dp"
        android:background="@color/black"
        app:layout_constraintBottom_toBottomOf="parent"
        app:layout_constraintEnd_toEndOf="parent"
        app:layout_constraintStart_toStartOf="parent"
        app:layout_constraintTop_toBottomOf="@+id/fold" />

</androidx.constraintlayout.motion.widget.MotionLayout>
其中两个视图来自 Exoplayer 套件,您可以通过它们来为 PlayerView (显示媒体的界面) 和 PlayerControlView (播放控件的容器) 指定不同的布局。
第三个视图是一个 ReactiveGuide。它被放置在另外两个视图中间,并且以 Guideline 的形式作为另外两个视图的划分。
主要的 PlayerView 被限制为永远在 ReactiveGuide 的上方。这样一来,当您将 ReactiveGuide 从底部移动至折叠位置时,布局的转换就会发生。
您可能想要将播放控件一直限定在 ReactiveGuide 的底部。这样一来该控件会在屏幕完全展开时被隐藏,而当屏幕部分折叠时又出现在底部。
请注意第 28 行的 layout_constraintGuide_end 属性。它就是当您移动参考线时需要改变的值。由于 ReactiveGuide 是水平的,此属性指的是参考线到父布局底部的距离。
让您的应用感知屏幕折叠
现在进入最重要的部分: 如何获知您的手机何时进入了桌面模式,并获取到折叠处的位置呢?
当初始化完成后,WindowManager 库允许您通过收集来自函数 WindowInfoRepository.windowLayoutInfo() 的数据流 Flow<WindowLayoutInfo> 监听布局变化:
override fun onStart() {
        super.onStart()
        initializePlayer()
        layoutUpdatesJob = uiScope.launch {
            WindowInfoRepository.windowLayoutInfo
                .collect { newLayoutInfo ->
                    onLayoutInfoChanged(newLayoutInfo)
                }
        }
    }

    override fun onStop() {
        super.onStop()
        layoutUpdatesJob?.cancel()
        releasePlayer()
    }
如果您想要了解如何初始化和释放一个 Exoplayer 实例,请查阅——Exoplayer codelab。
每当您获取到新的布局信息时,您可以查询显示屏特征,并检查设备当前显示中是否存在折叠或铰链:
private fun onLayoutInfoChanged(newLayoutInfo: WindowLayoutInfo) {
        if (newLayoutInfo.displayFeatures.isEmpty()) {
            // 如果当前屏幕没有显示特征可用,我们可能正位于副屏观看、
            // 不可折叠屏幕或是位于可折叠的主屏但处于分屏模式。
            centerPlayer()
        } else {
            newLayoutInfo.displayFeatures.filterIsInstance(FoldingFeature::class.java)
                .firstOrNull { feature -> isInTabletopMode(feature) }
                ?.let { foldingFeature ->
                    val fold = foldPosition(binding.root, foldingFeature)
                    foldPlayer(fold)
                } ?: run {
                centerPlayer()
            }
        }
    }
注意如果您不想使用 Kotlin 数据流,从 1.0.0-alpha07 版本开始,您可以使用 window-java 这个工具,它提供一系列对 Java 友好的 API 来注册或是取消注册回调函数,或是使用 window-rxjava2 以及 window-rxjava3 工具来使用适配 RxJava 的 API。
当设备方向为水平向且 FoldingFeature.isSeparating() 返回了 true 时,此设备可能正处于桌面模式。
如果是这样的话,您可以计算出折叠处的相对位置,然后将 ReactiveGuide 移动到该位置;如果情况相反,您可以将其移动到 0 (屏幕底部)。
private fun centerPlayer() {
        ConstraintLayout.getSharedValues().fireNewValue(R.id.fold, 0)
        binding.playerView.useController = true // 使用内嵌画面的控件
    }

    private fun foldPlayer(fold: Int) {
        ConstraintLayout.getSharedValues().fireNewValue(R.id.fold, fold)
        binding.playerView.useController = false // 使用位于屏幕底部一侧的控件
    }
当您这样调用函数 fireNewValue 时,库函数会改变 layout_constraintGuide_end 的值。当设备完全展开时,整个屏幕都会被用于显示主 PlayerView。
最后的问题: 当设备折叠时,您应该将 ReactiveGuide 移动到哪里?
FoldingFeature 对象有一个方法 bounds(),它可以获得屏幕坐标系内折叠处的边界矩形信息。
如果您要实现横屏功能,那么大多数时候,边界会以一个在屏幕中垂直居中的矩形来表示,它和屏幕一样宽,并且高度与铰链相同 (对于可折叠设备而言值为 0,对于双屏幕设备而言会是两个屏幕之间的距离)。
如果您的应用处于全屏模式,您可以将 PlayerView 固定在 FoldingFeatures.bounds().top 的顶部,并将 ControlView 固定在 FoldingFeatures.bounds().bottom 的底部。
在其他的所有情况下 (非全屏) 您需要考虑导航栏或屏幕上其他 UI 组件占据的空间。
为了移动参考线,您必须指定它距离父布局底部的距离。计算 ReactiveGuide 恰当位置函数的一种可能的实现如下:
    /**
     * 返回折叠处相对于布局的位置
     */
    fun foldPosition(view: View, foldingFeature: FoldingFeature): Int {
        val splitRect = getFeatureBoundsInWindow(foldingFeature, view)
        splitRect?.let {
            return view.height.minus(splitRect.top)
        }

        return 0
    }

    /**
     * 获取 displayFeature 变换到视图坐标系的边界和它当前在窗口中的位置。
     * 这里的计算中默认会包含内边距。
     */
    private fun getFeatureBoundsInWindow(
        displayFeature: DisplayFeature,
        view: View,
        includePadding: Boolean = true
    ): Rect? {
        // 视图在窗口中的位置要与显示特征在同一坐标空间中。
        val viewLocationInWindow = IntArray(2)
        view.getLocationInWindow(viewLocationInWindow)

        // 将窗口中的 displayFeature 边界矩形与视图的边界矩形相交以裁剪边界。
        val viewRect = Rect(
            viewLocationInWindow[0], viewLocationInWindow[1],
            viewLocationInWindow[0] + view.width, viewLocationInWindow[1] + view.height
        )

        // 如果需要的话,包含内边距
        if (includePadding) {
            viewRect.left += view.paddingLeft
            viewRect.top += view.paddingTop
            viewRect.right -= view.paddingRight
            viewRect.bottom -= view.paddingBottom
        }

        val featureRectInView = Rect(displayFeature.bounds)
        val intersects = featureRectInView.intersect(viewRect)

        // 检查 displayFeature 与目标视图是否完全重叠
        if ((featureRectInView.width() == 0 && featureRectInView.height() == 0) ||
            !intersects
        ) {
            return null
        }

        // 将显示特征坐标偏移至视图坐标空间起始点
        featureRectInView.offset(-viewLocationInWindow[0], -viewLocationInWindow[1])

        return featureRectInView
 }
总结
在本文中,您学习了如何通过实现支持桌面模式的灵活布局来改善可折叠设备上媒体应用的用户体验。
敬请继续关注后续关于不同形态参数开发指南的文章!
更多资源
- Exoplayer Codelab: 用 Exoplayer 播放视频流
- 桌面模式实例应用
- 为可折叠设备而设计
- 为可折叠设备构建应用
- Jetpack WindowManager
- 使用 MotionLayout 管理运动和微件动画
欢迎您通过下方二维码向我们提交反馈,或分享您喜欢的内容、发现的问题。您的反馈对我们非常重要,感谢您的支持!